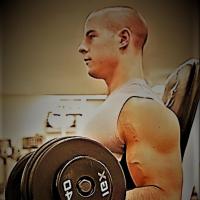
You’re in the gym, and you see the person next to you squatting with 200 pounds on the barbell.
“Whoa,” you think. “I can’t wait to lift that much!”
Slow down, cowboy. Especially if you’re just starting out in your lifting journey, it’s important to figure out how much weight you should lift based not only on your goals but also on your equipment, experience, and time available to work out.
Let’s dig in.

First, Why Is It Important You Lift The Right Amount Of Weight?
Short answer: to avoid injury.
Longer answer: to avoid injury, perfect your form, and lift weights to get strong for years to come.
Lifting weights isn’t just another exercise. Like all new things you start, you can’t go from zero to expert right away. You can’t pick up a bow and arrow and immediately get all bullseyes, you can’t go from couch potato to 5K marathon runner in one week, and you can’t go from no strength to benching your bodyweight right away.
Your body, especially if you’re new to lifting weights, doesn’t have the strength to immediately start lifting heavy. You could be lean or a cardio lover, which still doesn’t mean you have the muscle strength necessary to lift weights.
If you decide to pick up a heavy weight without knowing if it’s right for you, you run the risk of serious injury. Think about it: if you’re benching too heavy (especially without a spotter) and you can’t finish the lift, where is that bar going? Right onto your chest or throat.
Or, if you’re deadlifting too heavy, your form will break down, and where is the stress and power of that lift going? Straight to your lower back. Say hello to bedrest for a few weeks.
TL;DR: Figure out the right weight to avoid injury.

Second, Set Your Goal
Not all weight lifting is created equal. There are different ways to train with weights depending on your unique goal.
General Fitness
Weight lifting (or strength training, or resistance training) is an excellent way to boost your overall general fitness. When you do it right, it can help you lose fat, increase your strength and muscle tone, and improve your bone density. It can also combat age-related muscle decline and improve your balance, not to mention having a positive impact on your appearance.
While strength training for general fitness will be a little less rigid in terms of programming, that doesn’t mean you should go into the gym and lift willy nilly without a plan.
First, make sure your program trains all the major muscle groups at least twice per week. Also, include push, pull, squat, lunge, hinge, rotation, gait, and balance work for a well-rounded program.
Training for Strength
Training specifically for strength means training your muscles to lift as heavy as they can. This doesn’t necessarily result in “bulkiness” or huge, bulging muscles. It sometimes doesn’t even result in “looking like you lift” at all. (Ever seen Olympic weightlifters that, by sight, look “out of shape” but can deadlift 400 pounds? Yeah, sort of like that, though an Olympic weightlifting program is different.)
Lifting weights for strength means your workouts could have anywhere from 3–4 sets in a medium rep range, somewhere around 8–10. Keep your rest periods short, around 30 seconds or 1 minute between exercises. Aim to try and add weight when you feel you can do 2–4 more reps after your assigned amount (more on this later).
Improving Muscular Endurance
Muscular endurance means holding a position for a long time or doing the same motion many times. For example, how long you can hold a squat or how many times you can lift a box over your head are all thanks to high muscular endurance.
Endurance is key to strength training and to everyday life. A muscular endurance workout will have sets of 2–4 in a high rep range, like 15–20. Similar to training for strength, keep your rest periods short. The goal isn’t to lift super heavy but rather to force your muscles to work for longer periods.
Training for Muscle Size
Training for muscle size is also called hypertrophy training. This is the kind where you “look like you lift” and gets you physically bigger muscles.
A note on gaining muscle mass
Unless you’re a bodybuilder whose literal, full-time job is to look like Arnold Schwarzenegger, you won’t. You literally can’t get “big and bulky” without extreme diets and likely certain drugs. So even if you’re training for hypertrophy, relax. You won’t hulk out.
A hypertrophy workout looks like 3–5 sets of 6–12 reps for each exercise. Work at about 75–85% of your maximum effort and rest for 1–2 minutes between exercises. With this training, you also lift more slowly than other types.
Make sure to build in “deload” periods every 4 weeks, where you lift lighter and with fewer reps. This helps reset your muscles (that have been adapting to heavy loads for weeks), so they get resensitized to heavy lifting when you get back to it.
Training for Weight Loss
One thing strength training can help you with is weight loss. However, it’s important to note you’re not “burning” fat or “replacing” it with muscle when you strength train.
Your body stores fat as triglycerides. These molecules have to be broken down into smaller pieces called free fatty acids and glycerol, which enter the bloodstream as energy. When you exercise, this is where your body turns to fuel that workout. This is the process by which you lose weight.
Also, muscle requires more calories to maintain than fat does, even while you’re resting. So adding muscle to your body means automatically boosting your metabolism and resting metabolic rate. Combine this with a slight caloric deficit (keyword: slight, only about 300–500 calories) to lose weight with strength training.
A weight-loss strength training workout would look like 3–4 sets of 8–10 reps per exercise. But, again, keep rest periods short.
You can also do “supersets” where you do two exercises back-to-back, with minimal rest between them, then rest for 1 minute before doing your next set of those two exercises.

Start With Your Bodyweight Or (Really) Low Weights
Yes, really. You absolutely need to begin with your bodyweight or really, really low weights (we’re talking 5 pounds here).
Why? Because your form needs to be super solid before you add load (weight).
Remember earlier, when we mentioned avoiding injury? If you try to add weight without your muscles in their proper places and tensions, you will injure yourself. Period.
Now, for moves like deadlifts or overhead presses, how do you do those with just your body weight?
For deadlifts, use a broomstick, mop handle, or empty PVC pipe (about 1.5” diameter) and hold that to pretend it’s a barbell. For overhead presses, you can either hold something super light, like a toilet paper roll or just clench your fist as if you’re holding a dumbbell.
If you’re afraid of looking silly, practice from the secretive comfort of your own home first. Then, try filming yourself with your cell phone to get an idea of how close your form is with just bodyweight.
You can also use a broomstick to practice holding the barbell for things like back or front squats, bench presses, etc.
TL;DR: To avoid injury, you must start with just your bodyweight.

Learn The Proper Form
We’ve already explained to you why you need to learn proper form. Now we’ll go over three of the most basic exercises and explain what that form looks like.
This is to drill it home to you that there’s a lot going on in terms of form that you need to master. (We’re going to use the broomstick or fake dumbbells here, because that’s what you’re using as a beginner.)
Deadlift
Deadlifts are a staple in almost every exercise routine, and for a good reason. They target your posterior chain (glutes and hamstrings) and hips; the muscles of the lower, mid, and upper back; scapula stabilizers; upper arms; forearms; grip; and anterior core.
Basically, deadlifts are a full-body exercise with a lot of bang for your buck. Here’s how to do them correctly:
- Place your broomstick on stacks of books, blocks, or bricks. Anything that raises the stick to about mid-shin height (the approximate height of a barbell loaded with weight plates).
- Keep the sick close to your shins and your shins vertical.
- Stand with your feet about hip-width apart. Keep your toes pointing straight or angle them out slightly, either way.
- Hinge/push your hips back to lower yourself to the stick. Keep your spine neutral (don’t bend at the waist and don’t round your upper back). Keep your chest up but don’t over-arch your lower back.
- Grip the stick just outside of your legs with your palms facing you.
- Take a deep breath into your belly and brace your core. Then, lightly tuck your rib cage toward your hips and press your body away from the ground using your legs.
- At the top, extend your knees, squeeze your glutes, push your hips into the stick, and keep your core braced. Next, squeeze your upper arms into your sides to create tension in your upper body. Also, keep your shoulder blades back and down (lats tight).
- Make sure your weight is in the mid-back portion of your feet, but don’t let your toes lift off the ground.
- Throughout your lift, it’s vital that you don’t allow your rib cage to flare or your lower back to arch. Instead, actively tuck your rib cage toward your hips and keep your core braced.
- Lower the broomstick by hinging your hips back (not by rounding your back!). Your spine should remain neutral throughout the exercise.
- The stick should travel along your body through the entire move (make the stick paint your body).
- Throughout, keep your chin tucked and neck in neutral alignment (don’t look up).
- Reset with the broomstick on your stacks of items and do it again.
Definitely film yourself doing this move, as it’s very easy to over arch your back or forget to keep your lats engaged.
Squat
Another excellent compound move to master with proper form. Squats target your quads, hamstrings, and glutes.
Note that in this “how-to” you’ll skip steps 1 and 5 because you’re using a broomstick for now. But you’ll need to know those steps when you graduate to the barbell, so there you go.
How to do a barbell (broomstick) back squat:
- Grab the barbell with both hands, much wider than shoulder-width. Position your entire body directly underneath the bar.
- Place the broomstick on the ridge of your muscle that makes up your upper traps. Never rest the stick (or barbell) on your neck!
- Grip the stick firmly and pull it down slightly onto this ridge of muscle to create stability in your upper body/spine.
- Set your feet about hip-width apart in your heels and about shoulder-width apart in your toes. You can vary the width and angle to find what’s most comfortable for you.
- Before you lift the bar, take a deep breath in through your nose, brace your core, and lightly tuck your rib cage toward your hips. Then, stand up with the bar on your back and take a few steps back, so you’re in position.
- Repeat the breathing part of step 5 to prepare for your squat.
- Maintain muscular control and a smooth tempo as you simultaneously move your knees and hips and aim to sit between your heels.
- In the bottom position of the squat, it’s imperative to maintain muscular tension the entire time. Do not disengage your muscles. Also, do not sacrifice form for depth; sink to whatever depth keeps you in proper form.
- Drive your body away from the floor with your feet, squeezing your quads, glutes, and hamstrings.
- At the top, squeeze your glutes, quads, and hamstrings, brace your core, and keep your rib cage down to lock out.
- Keep a slight forward lean in your torso, but also keep your chest up. Don’t tip forward. Maintain a neutral spine throughout the exercise.
- Make sure the weight remains in the mid-back portion of your feet but keep your toes down.
- Don’t allow your knees to collapse in or fall outside of your feet.
- Reset before each rep and then repeat for your desired number of reps.
If you’re using fake dumbbells, just hold your clenched fists or toilet paper rolls at your sides throughout. The rest of the cues (muscular tension, neutral spine, etc.) all still apply.
Bench Press
This is a fantastic exercise to strengthen your chest, shoulders, and triceps. However, it’s also imperative to get your form right to avoid the bar slamming down onto you in a failed lift.
How to do a barbell (broomstick) bench press:
- Lie on a bench (or the floor, but a bench is better) so your eyes are directly under your broomstick. (Either prop the stick on something or just hold it over your head.)
- If using a bench, your feet should be shoulder-width apart and flat on the floor.
- Grab/hold the stick, so your hands are slightly wider than shoulder-width. Keep your wrists straight.
- Take a deep breath into your belly, brace your core, and lightly tuck your rib cage toward your hips (seeing a pattern?). Tighten the muscles in your upper back and draw your shoulder blades together and down. Squeeze your glutes.
- Unrack the bar (or lift your broomstick off your props). It should be directly over your shoulders, and your elbows, forearms, and wrists should all be vertical. Keep your shoulders packed (keep your arms in their sockets).
- Repeat step 4.
- Lower the stick. Think of it more as a rowing motion than letting the stick drop. It should touch between your sternum and your mid-chest. Keep your elbows at about a 75º angle to your body with your forearms staying vertical.
- Once the stick makes contact, press it away from your body to return it to the starting position. Lock your elbows at the top but don’t overextend them.
- Throughout the move, drive your feet into the floor to enhance your stability and engage the muscles in your lower body.
- Make sure your back isn’t excessively arched (a small arch is okay). Also, don’t allow your hips to leave the bench/floor.
- Reset and repeat for your desired number of reps.
When done correctly, the bench press is actually a full-body exercise.

Work In Your Rep Range
For whatever goal you choose — general fitness, strength, endurance, hypertrophy, or weight loss — work in the rep ranges listed above. For reference:
- General fitness: whatever you choose
- Strength: 8–10 reps
- Endurance: 15–20 reps
- Hypertrophy: 6–12 reps
- Weight loss: 8–10 reps
It’s going to take a little trial and error for you to figure out exactly how many sets and reps are best for you.

With How Much Weight Should I Start?
Once your form is solid with only your body weight and/or your faux weights, you can add some load. If you want to barbell train, the standard weight of the bar is 45 pounds (or the “women’s” barbell is 35 and the “training” barbell is 15).
That’s all a little heavy for a beginner, so you should start with dumbbells first (if you have them). It won’t be the exact same moves, but it will help you build strength.
If you have dumbbells, start with 5 pounds at the most. You can always use heavier ones next time if it feels super easy. It’s better to focus on getting comfortable with the movements and getting each rep correct before trying to throw a bunch of weight around.
If you finish your workout and still aren’t comfortable with the moves, it’s perfectly okay to use just the bar or the light dumbbells again next workout. Confidence in the movements is key to successful weight lifting, so don’t skip this part!
TL;DR: Use 5-pound dumbbells (and up) until you have enough strength to lift the barbell.

How Do I Know I Can Increase The Weight?
Once you’re comfortable with the moves and are executing them with good form with just the bar or your dumbbells, you can start increasing the weight. But, first, you need to figure out your “starting weight” or the weight at which you’ll start each future exercise.
Here’s how to figure that out:
- After a thorough warm-up routine, do each exercise with just the bar for your prescribed number of reps. (Using just the bar helps your body continue to warm up and primes your nervous system/muscles for that movement.)
- Add a small amount of weight to the bar. The amount will depend on how heavy the bar felt. If it was a bit of a challenge to do the exercise with just the bar, add a low amount, like 2.5 pounds. If it was easy, you can add more, like 10 pounds.
- Do your reps again. If you can complete them without losing form or slowing down a ton, you can add more weight. Again, how much weight depends on how that set felt.
- Continue this process until your form starts to break down or the speed of your lift gets slower on any of your reps.
Congratulations, that final load before your form broke down is now your starting point for future workouts!
How do you know you can increase the weight after you find your starting point? The same principle applies: if the reps felt super easy after your last set, add weight next time.
Using dumbbells? Again, the same principle of how much effort it takes you will guide you to when you should pick up the next heavier pair.
This is where excellent note-taking is essential. Each workout, for every exercise, be sure to track:
- How much weight you lifted
- How many sets and reps you completed
- How your lifts went
- How you felt during the workout
Did you lift to failure on your last set? Did your form break down at any point? Were the final few reps a struggle, or did you feel like you crushed it and could have done a few more?
If you failed to complete any of your reps or your form started to break down, consider lifting a little lighter the next workout. Focus on proper form and technique instead of adding weight. Remember, improving your form counts as progress. You’re still lifting better than you were the previous workout.
If you finished all your reps with stellar form and without the bar slowing significantly, congratulations! Consider adding more weight on the next workout.
TL;DR: Use your form and your perceived effort of how hard you worked to complete your reps as a guide to when you can add more weight.

How Do I Safely Lift Heavier Weight?
You may have heard of your 1-rep maximum or 1-rep max. This is the amount of weight you can lift for one single rep only. It can be a cool number to find out, but be careful.
If you’re new to lifting, follow your program for at least 6–8 weeks before attempting to find your 1-rep max. As you learn the different movement patterns for each exercise, you’ll continuously make tweaks and corrections. If you try to find your 1-rep max in the beginning of your lifting, your form is likely not completely solid, meaning the pounds you lift in your 1-rep max won’t be accurate.
Plus, lifting that heavy risks injury. Experienced lifters know how to handle a “failed lift” and bail out when they need to. Without this skill, you could seriously hurt yourself by pushing too hard too fast.
If you want to be one of those people squatting or deadlifting hundreds of pounds, the key is patience.
As a beginner, you’ll likely be able to make great strides in your fitness fairly quickly. This is because brand-new stress on your muscles forces them to get stronger fast to handle the next workout.
As you get more experienced, your gains will slow. This is because your muscles have adapted to the physical stress and are stronger than they were. (The human body is amazing at adapting to stress in its environment, and an exercise is a form of stress.)
When you get to the super-heavy lifts, you’ll likely only add a half a pound or even 1 pound to the bar at a time. That’s okay! Stay patient and keep lifting.
TL;DR: Stay patient when adding weight to your lifts, especially in the heavier ranges.

How Do I Know If I’m Lifting Too Heavy Or Too Light?
We touched on this a little bit earlier, but we’ll hammer it home here.
You’ll know you’re lifting too light if you get through your reps with ease. However, if you feel like you could do another set or even 3–4 more reps, it’s time to add some weight. (All that is dependent on your form and technique staying precise.)
You’ll know you’re lifting too heavy if you can’t complete your reps or your form breaks down. If your final few reps were super difficult, but you manage to complete them with proper form, stay at that weight until they’re easier.
The best advice is this: err on the side of lifting lighter than you think you can. You can always add weight to your next set or do an extra one. It’s better to make the too-light mistake than too heavy and hurt yourself.
TL;DR: Err on the side of lifting lighter than you think you can.

Can I Build Muscle Without Lifting Heavy Weights?
As a beginner, yes, you can build muscle without lifting heavyweights. In fact, that’s what we’ve been talking about in this entire article: start light.
In the beginning, you’ll build muscle rapidly. Once you get stronger and more experienced, however, you will need to lift heavier to keep making progress.
This is called the principle of progressive overload. Basically, you have to challenge your muscles in new or more difficult ways to keep getting stronger.
Again, the human body is marvelous at adapting to stressors. When you start to strength train, your muscles essentially go, “Oh, that was a new, hard thing we just did! We might have to do that again, so let’s build that area up a bit stronger.”
Then, of course, you do it again, and the cycle continues. Eventually, if you never add weight or change up your workout, your muscles essentially go, “Psh, we’ve done this a bunch of times already, no need to build here anymore.”
That’s why you have to progressively add stress to your muscles if you want to keep getting stronger.
TL;DR: In the beginning, yes, lift light. To keep making progress, you’ll have to lift heavier.

Wrapping It Up
You may have noticed that in this article, we didn’t actually specify exactly how much weight you should lift, e.g., “You need to deadlift X pounds.” That’s because it’s completely dependent on you as an individual.
So, start with your body weight to learn impeccable form. Then use light dumbbells or the barbell only. Then, as your reps get easier, add more weight.
Before you know it, you’ll be that person in the gym someone else sees and thinks, “Whoa, I can’t wait to lift that much!”